Acerca de

Independent Project:

Gallery of most successful work:
Statement Of Intent:
For my independent project, it is important to develop work from an artist study that I feel is the best, or I feel like I can continue to improve. In this case, I would like to use both Mari Mahr and Gjon Mili, exploring each artist and perhaps making a physical copy of edits. For Mari Mahr, the theme of her '13 Clues to a Fictitious Crime' focus on anonymity and implying sinister events without actually showing what has happened. To develop my work, I could print edits onto wood or acetone after having taken a new photoshoot. After this, perhaps going back to Gjon Mili and showing connotations to Tatiana Parcero, photograph a person moving their arms or legs in a certain motion. These images can then be translated into a gif to show the person moving. Depending how ach developments turn out, I could enhance this into a final piece.
Gallery of Inspiration:

Photoshoot Plan:

For my independent project, I am looking to develop my Mari Mahr work, such as by creating physical installments. My second developments, will likely build on my first developments and my third developments, could look at possibly printing images onto wood. In terms of aperture, these images were taken with an f-stop of 1.8, which helps to blur the background and allow the image to focus on specific parts of the photo rather than the whole composition. This is achieved through the wider lens which then can let more light in the lens and allow better focus. To heighten this affect I use an ISO of 32. Here I have drawn two images, firstly one of how the final product of the wood transfer is going to look in my mind, and the other shows more of an editing process, with glue, the wood and images to be transferred along with a paint brush. I have drawn what I intend to do in my independent project which includes image transfers onto different surfaces and presented in different ways.

Mari Mahr:

By using multiple exposure on this edit, not only does it distort the image but it also disorientates someone who views it. This idea enhances Mari Mahr's work, which is frequently described as puzzling and mysterious. To further explore this work, I am going to create similar edits and then going to print them on different materials such as tracing paper, acetate or wood. To make them more visually interesting and to add texture.
Gallery Of Images to use:

Creative Process:

I have printed off images from my reshoot edits. It was important to use a laser printer rather than an ink printer because otherwise the transfer process onto different materials is more difficult, as the image will smudge. After printing each photo, I decided to get rid of the straight edge borders by ripping each image's borders, making them see more authentic.

Creative Process:

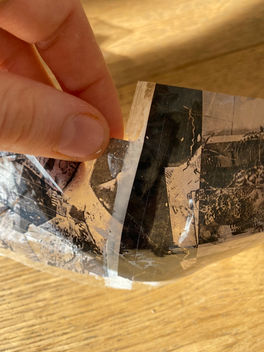
For these developments, I have decided to print my images onto sellotape, so that they become translucent. I started by using the tape over the top of the image, making sure that the whole thing was covered and then flattening the tape so there were no accidental air pockets.
Next, I filled a small bucket with one cup of water and flattened the image face down. Using my index finger along the tape lines, I rub off the white paper, so that underneath, the tape with the image imprinted on it was visible.
Lastly, I placed each edit on a towel to dry and then photographed each one.

Contact Sheet:

This contact sheet shows all images taken by my camera of the sellotape developments. There are 36 images in total and each were taken using different camera angles to capture different parts of the composition. The crosses eliminate the poor quality photographs and the circles show the better images. I will not include an editing process, because they only need to be made monochromatic.
Edits:

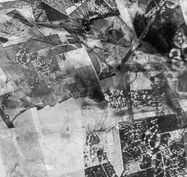
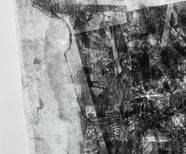
I chose to print these on sellotape, for a number of reasons. Firstly, I liked the way the image was made to seem translucent. The light is allowed through in areas where the image has a higher exposure, this creates a dappled effect and further complicates and distorts the image. This I felt made the images more mysterious and confusing, something I wanted to develop on when first making my Mari Mahr edits. Secondly, each photo above was created from many layers, the multiple exposure layers, and then having layered each one of these edits on top of each other to create a collage. I used a lightbox to illuminate the whole image and was keen to have certain objects identifiable, such as the match, which is an evident feature in many of these images. In terms of aperture, these images were taken with an f-stop of 1.8, which helps to blur the background and allow the image to focus on specific parts of the photo rather than the whole composition. This is achieved through the wider lens which then can let more light in the lens and allow better focus. To heighten this affect I use an ISO of 32.
Highlighting Success:

If I were to extend these edits, I would perhaps look to present them as an installment, where each photo are together in one composition, however it is still notable to recognise the most successful edits. I chose these four images, because I like the way that using a close up angle confuses an audience as the context or full composition of the image is not visible. Furthermore, by overlapping certain images, it helps to make the photograph chaotic and disorderly, which is translated a lot through Mari Mahr's work in her '13 Clues to a Fictitious Crime'.
Second Developments:
Creative Process:

For my second developments, I wanted to transfer my images onto a different material in this case plywood. To do this, I begun by painting a slab of wood black using acrylic paint. It was key to also paint the sides so that I had a back backgrounf.
Next, I wanted to make these images less manicured by painting over the black paint with white acrylic. I used a dry brush and little paint so that the paint uneasily spread making a washed affect. This was make the image transfers, firstly visible against the black background and also more natural as borders will be less visible.
After leaving the paint to dry completely for 24 hours, it was time to transfer the images. To do this I coated the wood with mod podge as shown on the left image.
The images that I used were printed using a laser printer as an ink printer would cause the ink to run and the image would not be able to transfer onto the material. Faced down, I stuck each photograph whilst the mod podge was still fresh. It was important to make sure no air bubbles were left and that the edges in particular of the image were firmly pressed down.
I had to leave the mod podge layer to dry for another 24 hours, to make sure that the image would best transfer. Then I used lukewarm water to wet each image. I then used my fore finger to rub off the paper. This revealed the composition which had transferred onto the board of wood. This is shown on the left.
After having repeated this process several more times for multiple sets of images, which I layered upon other images, I coated the board with adhesive pva glue. This wood add a shine to the image and make the composition of the transferred photographs more easily visible.
This is how the end result was, however I was reluctant to leave it like this because it felt unfinished. This was mainly die to the obvious blank white parts where an image was not transferred. I decided because of this to complete another set of transfers on top of this board, mainly to fill the gaps. To do this, I repeated the same steps from earlier and then used another coat of pva to finish.
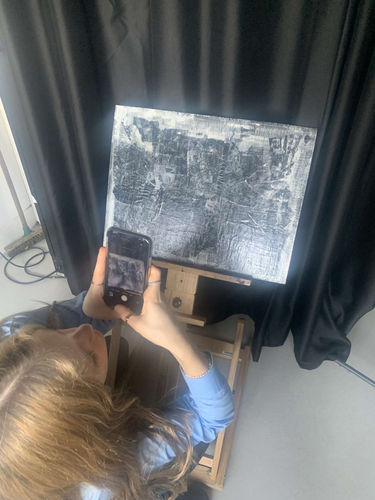
Finally, I presented this development using an easel and a black curtain, to make the image more theatrical and dramatic, similar to Mari Mahr's '13 Clues to a Fictitious Crime'. This image shows me taking the photos.
Contact Sheet:

This contact sheet shows all of the images taken of my second developments, when shooting, I made sure to use a variety of angles including a close-up undershot, wide angle and a medium shot. I wanted to capture the whole composition in some images and specific parts in other images. This was also helpfully achieved by managing the aperture, I chose an aperture of 1.8, which blurred the background and limited the amount of light entering the lens, so the composition was in clearer focus. Furthermore, the ISO of these images was 125, and I also used a fast shutter speed, which make the images more sharp. This is particularly important because these images have a complicated, confusing composition that is made easier through the focus being better. For this contact sheet crosses and circles demonstrate which images achieved the desired affect and will go on to be edited and which won't be.
Edits:

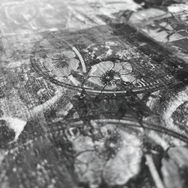
Although, I am aware of what exactly is occurring in the images, and which part of the composition is being photographed, I was keen to keep these images vague in a sense, by cropping parts of the composition and using the rule of thirds, to centre the parts which were in focus. I chose an aperture of 1.8, which blurred the background and limited the amount of light entering the lens, so the composition was in clearer focus. Furthermore, the ISO of these images was 125, and I also used a fast shutter speed, which make the images more sharp. This is particularly important because these images have a complicated, confusing composition that is made easier through the focus being better. A lot of Mari Mahr's work, is disorientating, which is something I was also keen to translate. Despite the fact that some images faked and did not transfer fully, I think this development is successful at experimenting with different materials such as ply wood.
Highlighting Success:

I chose these images to feature in my highlighting success because of the way that they best incorporated and captured the essence behind Mari Mahr's work, which is fndamentally confusing and sinister. The reoccurring theme of the flowers in the necklace allows the audience to recognise parts and still identify certain objects. I also chose these images because of the way that they best showed how transferring an image onto wood adds texture to the images by making them seem rougher and also shows a higher level of creaticity. In a further shoot, I could perhaps explore layering objects on top of the boards.
Third Developments:
Inspiration:

Editing Process:
For my third developments, I am looking to recreate this image above, however, I will use my edits from my first developments, the selotape transfer.

To start with, I needed to cover the toilet rolls that I was using to hold the images. To do this, I printed off images from my Mari Mahr edits and ripped them into suitable squares. Ripping allows the images to seem authentic and more dated, such as Mari Mahr's work.
To glue the images, I used modpodge glue and covered four cardboard rolls. They needed twenty four hours to dry. I have decided to create two installations, one will be longer then the other to show a variety.
For these developments, I am going to use the edits from earlier not copies because I want to firstly show how I develop my ideas and, because the sellotape makes the transfers translucent allowing light to pass through and in turn highlighting the compositions . I split each edit in half, so they matched the height of the rolls.
After that, I used modpodge again to connect each edit . The image on the bottom right shows the length of the longer installation. Next, I attached the sellotape edits to each roll, so that one toilet roll stood on either side.
Finally, to photograph them, I used a black background, one for the base and the other against a wall. I took photos of each edit separately and then together, to interlink them.

Contact Sheet:

Each contact sheet has been scrutinized and inspected so that the most suitable images were selected, using the red circles. On the other hand, the photos I felt were either out of focus or did not have a good angle were eliminated using red crosses. Contact sheets are commonly used by artists in order to make it easier to visualise and compare images as they appear side by side. For me, I have always used contact sheets as I find it easier to take more images meaning some will not be high quality and therefore would be a waste to edit. In this case, I have used 50 images in these two contact sheets. Next, I will upload these to photoshop to be edited.
Editing Process:

Some images needed cropping, so for those, I used the rule of thirds to roughly ensure that the main focus of the image was in the middle third, however this image did not need cropping, so I started by making the image black and white. This was done by lowering the saturation to negative 100.
After this, I changed the levels of the image, which in other more technical terms is the exposure and shadows. I increased the central grey tab to around 0.8 and then changed the highlights to roughly 240. I didn't do a lot of editing because I wanted to keep on the way that Mari Mahr's images were hardly edited.
Edits:

Whilst photographing, I used different angles, some being a wide shot, to show the whole composition and then others being a close up in order to zone in on certain parts. Alternatively, I used a birds eye view as this would make the images more exciting visually and authentic. Each photograph was taken with an aperture of 1.8, which blurred the background and limited the amount of light entering the lens, so the composition was in clearer focus. Furthermore, the ISO of these images was 125, and I also used a fast shutter speed, which make the images more sharp. This is particularly important because these images have a complicated, confusing composition that is made easier through the focus being better. For some photos, I was keen to show elements from where these images originated from, before the transfers, such as the flowers and bracelets. It was also important for me to show depth, by using a lower angle, or showing the images to be more three dimensional through all the methods mentioned above.
Highlighting Success:

For this highlighting success in particular, I have chosen images which include depth and make the images seem more three dimensional. This makes each image appear exciting, but also helps make each photo realistic, so it seems as though the installations are physically in front of you. For my final outcome, I hope to continue studying Mari Mahr and transfers.


